This function can be operated by the institutional administrator from the admin screen. The storage that is mainly used within an institution is called the institutional storage.
In GakuNin RDM, you will select the storage to be mainly used from the list of storage services and operate it as the institutional storage.
You can enter the required information for each provider in 'Institutional Storage' in the menu. Each user interface is different for each storage service. Please select the storage service from (1) to (3) below and check the operational method.
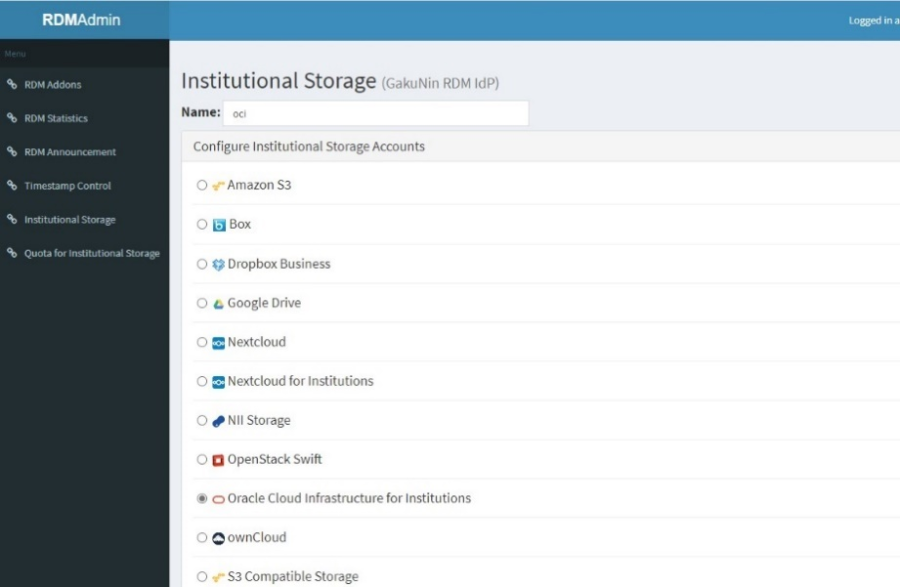
(1)Selecting Swift as institutional storage
①On the 'Institutional Storage' screen, enter an arbitrary storage name in the 'Name' form, select OpenStack Swift, and click the 'Save' button.
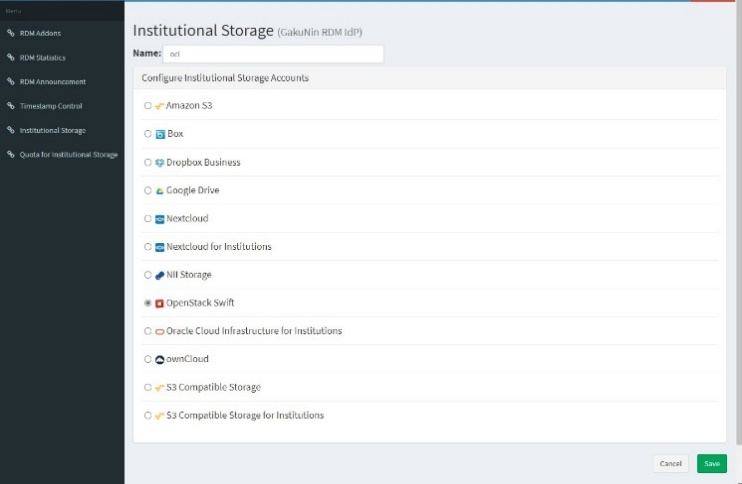
②A confirmation screen will be displayed for changing the institutional storage.
If you agree to the change, enter the character string after 'Type the following to continue:' in the form and click the 'Change' button.
* If you do not agree with the change, you can return to the previous screen by clicking the 'Cancel' button.
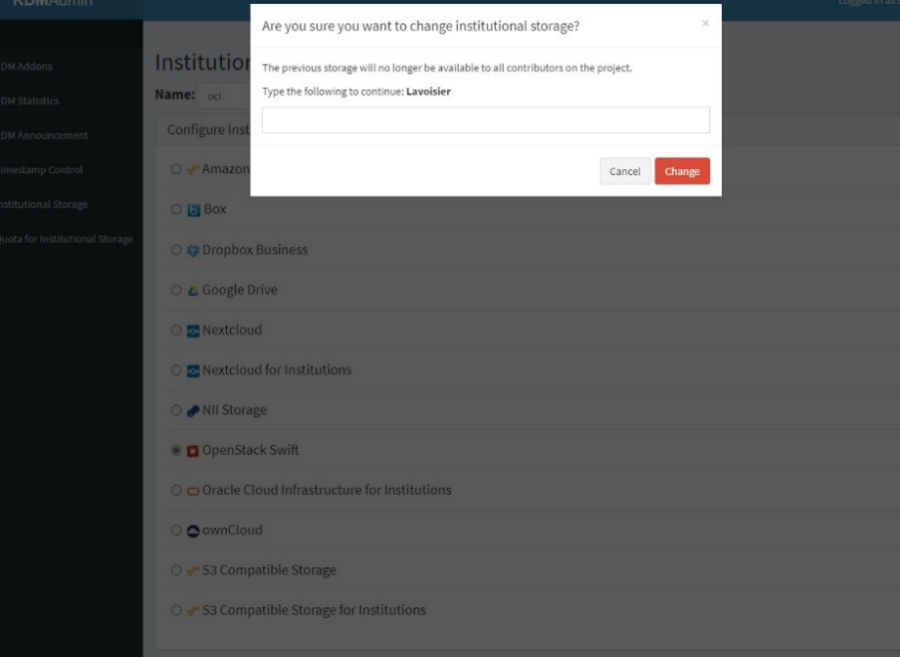
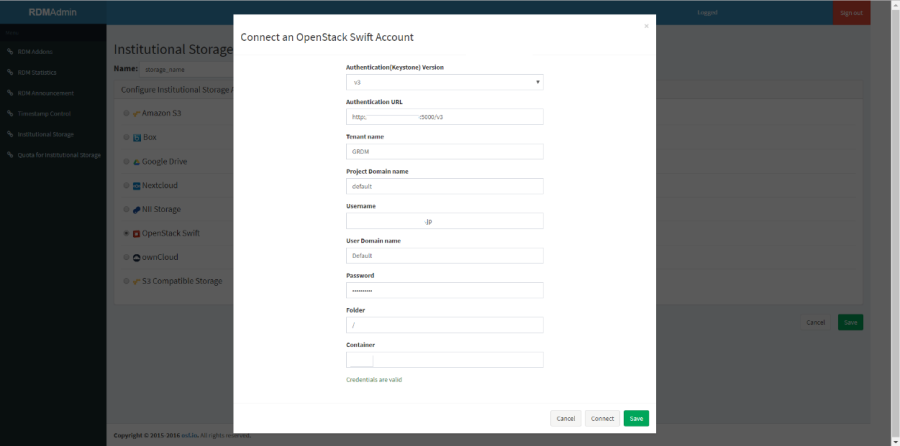
③The input screen for authentication and settings information will be displayed. Fill out each form according to the following and click the 'Connect' button to perform a connection test.
* Please note that the ‘Connect’ button will be inactive until all the items required for connection are entered.
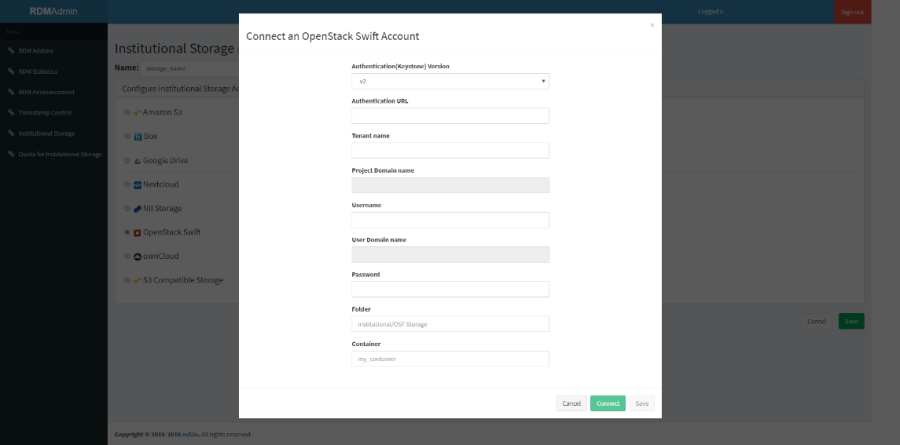
■ Items required for authentication to OpenStack Swift
Item |
Input Type |
Contents |
|---|---|---|
Authentication (Keystone) Version |
dropdown |
OpenStack Swift version |
Authentication URL |
text input |
OpenStack Swift authentication URL |
Tenant name |
text input |
Target tenant name |
Project Domain name |
text input |
Target project domain name |
Username |
text input |
Target account username (email address) |
User Domain name |
text input |
Target user domain name |
Password |
text input |
Target account password |
Container |
text input |
Target container name |
If the connection test is successful, ‘Credentials are valid’ will be displayed. Then, proceed to step ④.
If the connection test fails, ‘Unable to list containers. Listing containers is required permission.’ will be displayed.
Please correct the error and click the ‘Connect’ button again.
④Click the 'Save' button to save the institutional storage settings.
(2)Selecting Amazon S3 as institutional storage
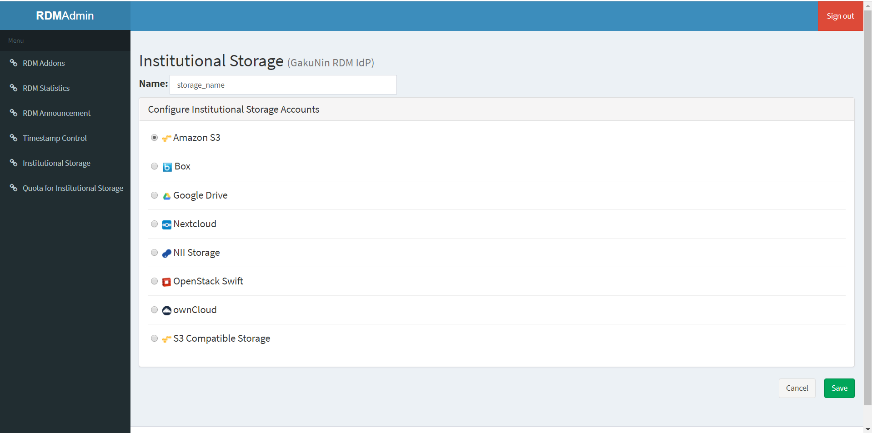
①On the 'Institutional Storage' screen, enter an arbitrary storage name in the 'Name' form, select Amazon S3, and click the 'Save' button.
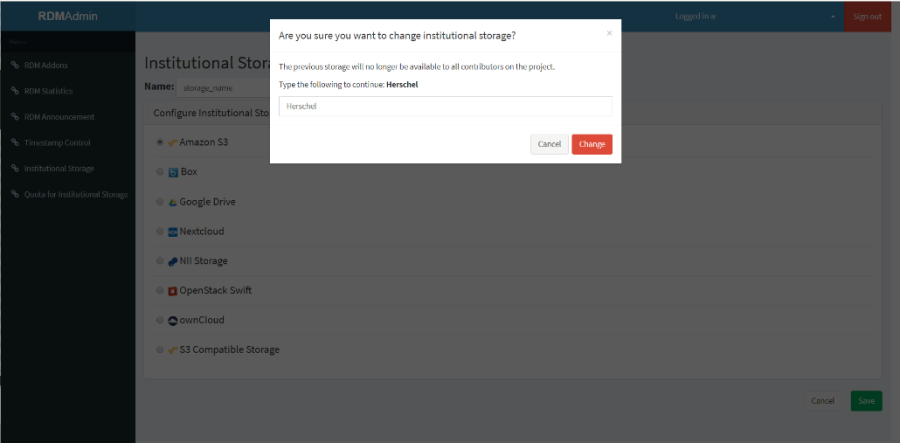
②A confirmation screen will be displayed for changing the institutional storage.
If you agree to the change, enter the character string after 'Type the following to continue:' in the form and click the 'Change' button.
If you do not agree with the change, you can return to the previous screen by clicking the 'Cancel' button.
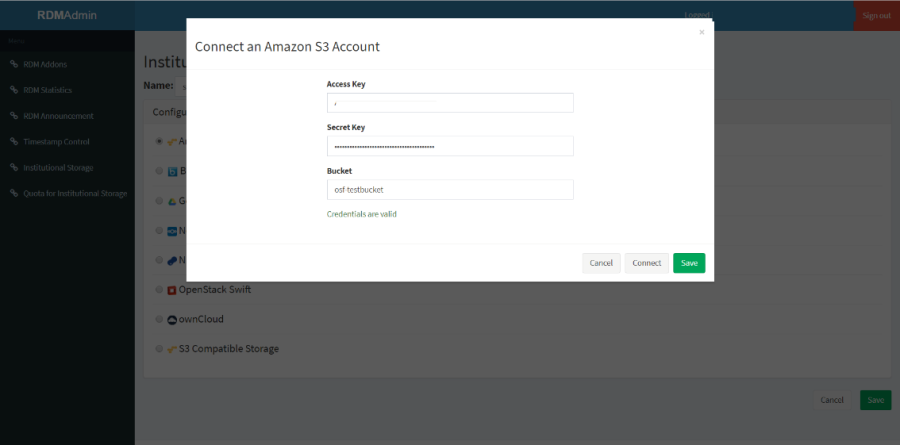
③The input screen for authentication and settings information will be displayed. Fill out each form according to the following and click the 'Connect' button to perform a connection test.
Please note that the 'Connect' button will be inactive until all the items required for connection are entered.
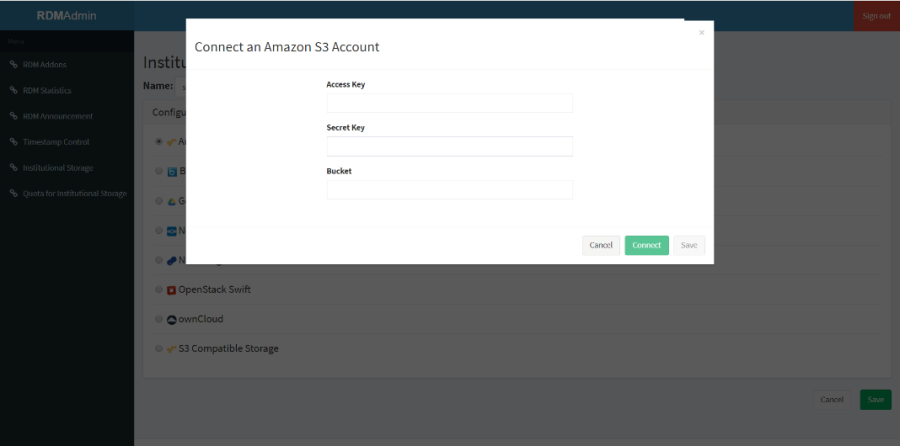
■ Items required for authentication to Amazon S3
Item |
Input Type |
Contents |
|---|---|---|
Access Key |
text input |
S3 Access Key |
Secret Key |
text input |
S3 Secret Key |
Bucket |
text input |
Target Bucket Name |
If the connection test fails, the error content will be displayed. Correct the error and click the 'Connect' button again.
If the connection test is successful, 'Credentials are valid' will be displayed. Then, proceed to step ④.
⑤Click the 'Save' button to save the institutional storage settings.
(3)Selecting S3 Compatible Storage as institutional storage
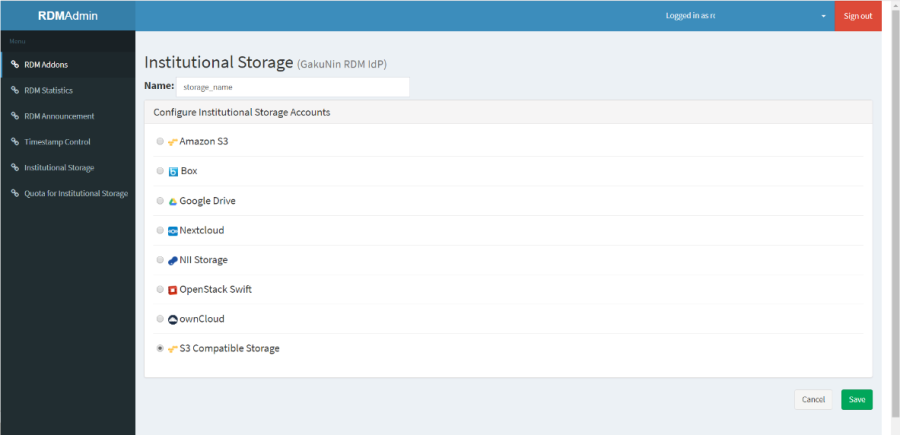
①On the 'Institutional Storage' screen, enter an arbitrary storage name in the 'Name' form, select S3 Compatible Storage, and click the 'Save' button.
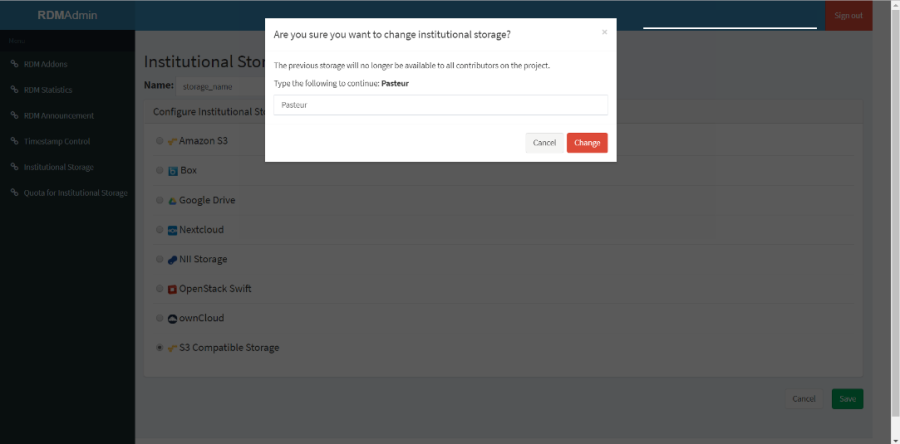
②A confirmation screen will be displayed for changing the institutional storage.
If you agree to the change, enter the character string after 'Type the following to continue:' in the form and click the 'Change' button.
If you do not agree with the change, you can return to the previous screen by clicking the 'Cancel' button.
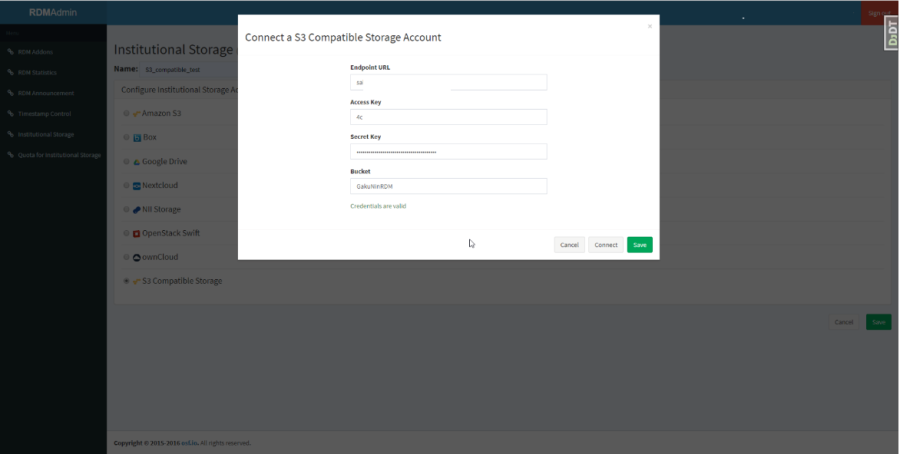
③The input screen for authentication and settings information will be displayed. Fill out each form according to the following and click the 'Connect' button to perform a connection test.
* Please note that the 'Connect' button will be inactive until all the items required for connection are entered.
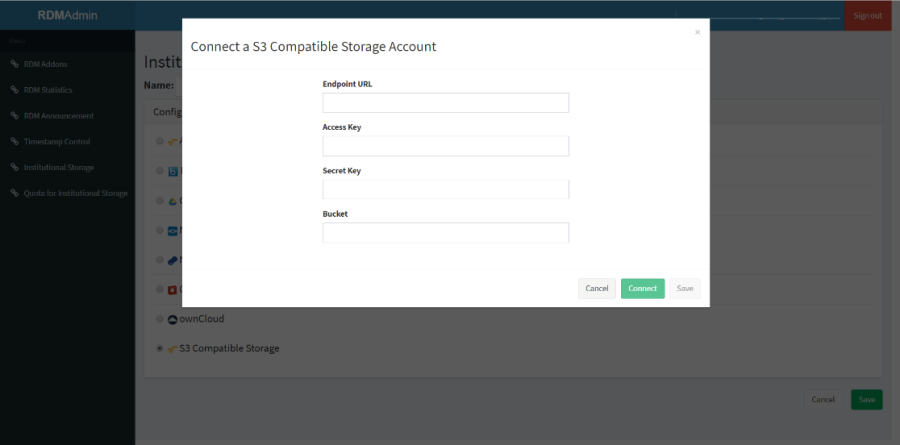
■ Items required for authentication to S3 Compatible Storage
Item |
Input Type |
Contents |
|---|---|---|
Endpoint URL |
text input |
Endpoint URL (Host Name) |
Access Key |
text input |
S3 Compatible Storage Access key |
Secret Key |
text input |
S3 Compatible Storage Secret key |
Bucket |
text input |
Target Bucket Name |
If the connection test fails, the error content will be displayed. Correct the error and click the 'Connect' button again.
If the connection test is successful, 'Credentials are valid' will be displayed. Then, proceed to step ④.
④Click the 'Save' button to save the institutional storage settings.

 日本語
日本語
