 日本語
日本語
Using the Project Metadata Editing and Registration function, file metadata in GakuNin RDM project stored in daily research activities can be organized and used for research reports.
The editing and registering function is also called "Workflow Edit Mode," which allows you to organize file metadata created in "Quick Edit Mode" in your daily research activities into formal project metadata to help you write your research reports.
Preparation
If you have your own e-Rad researcher ID, registering it in advance under “ID” in the “Profile” section of your personal settings will enable certain input assistance features. ※Starting with GakuNin RDM (ver. 25.10.29), the metadata add-on is enabled by default when creating projects. If it is not enabled in projects created previously, please refer to the user manual section “Enabling the Metadata Management Function” to activate the metadata add-on.
Editing project metadata
To edit project metadata, please follow the instructions below. Changes to project metadata are saved automatically as you edit.
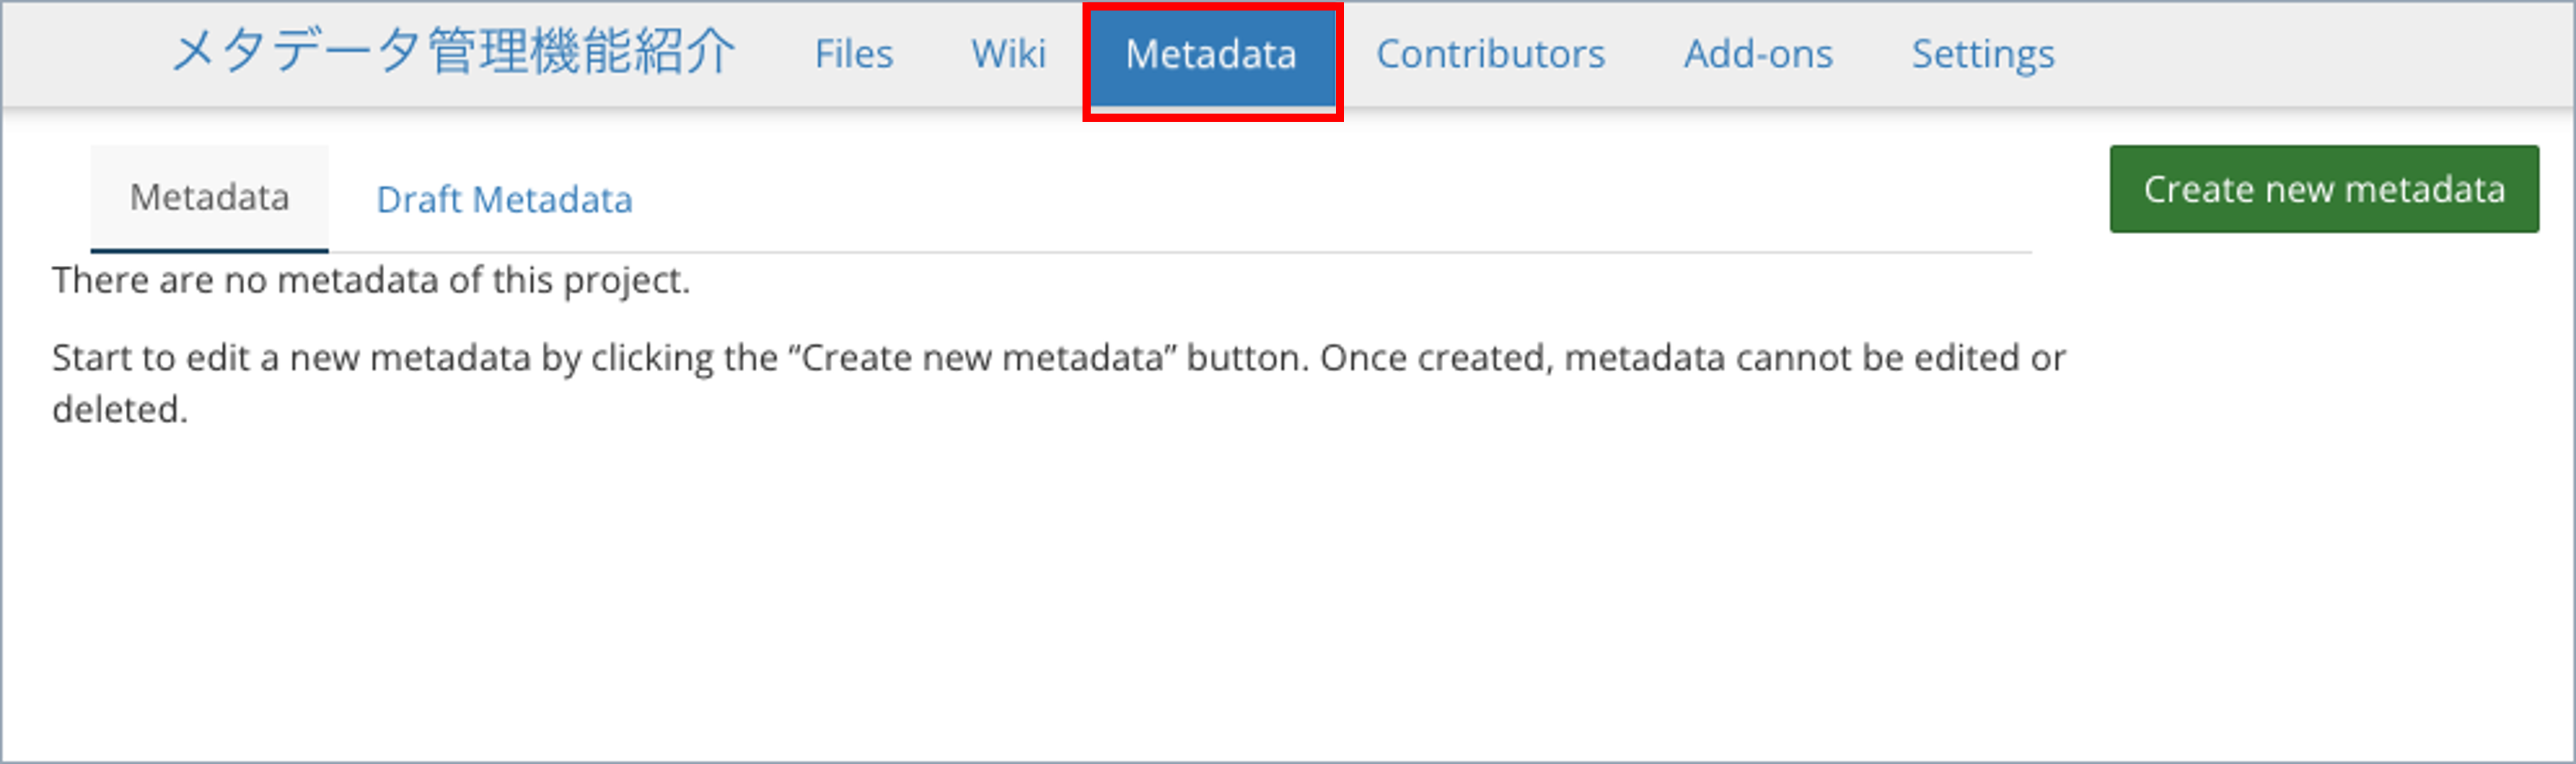
1.Go to Project Metadata Management screen
Click "Metadata" on the navigation bar of the project screen. On this screen, you can refer to project metadata that is being edited or that has been registered in the past.
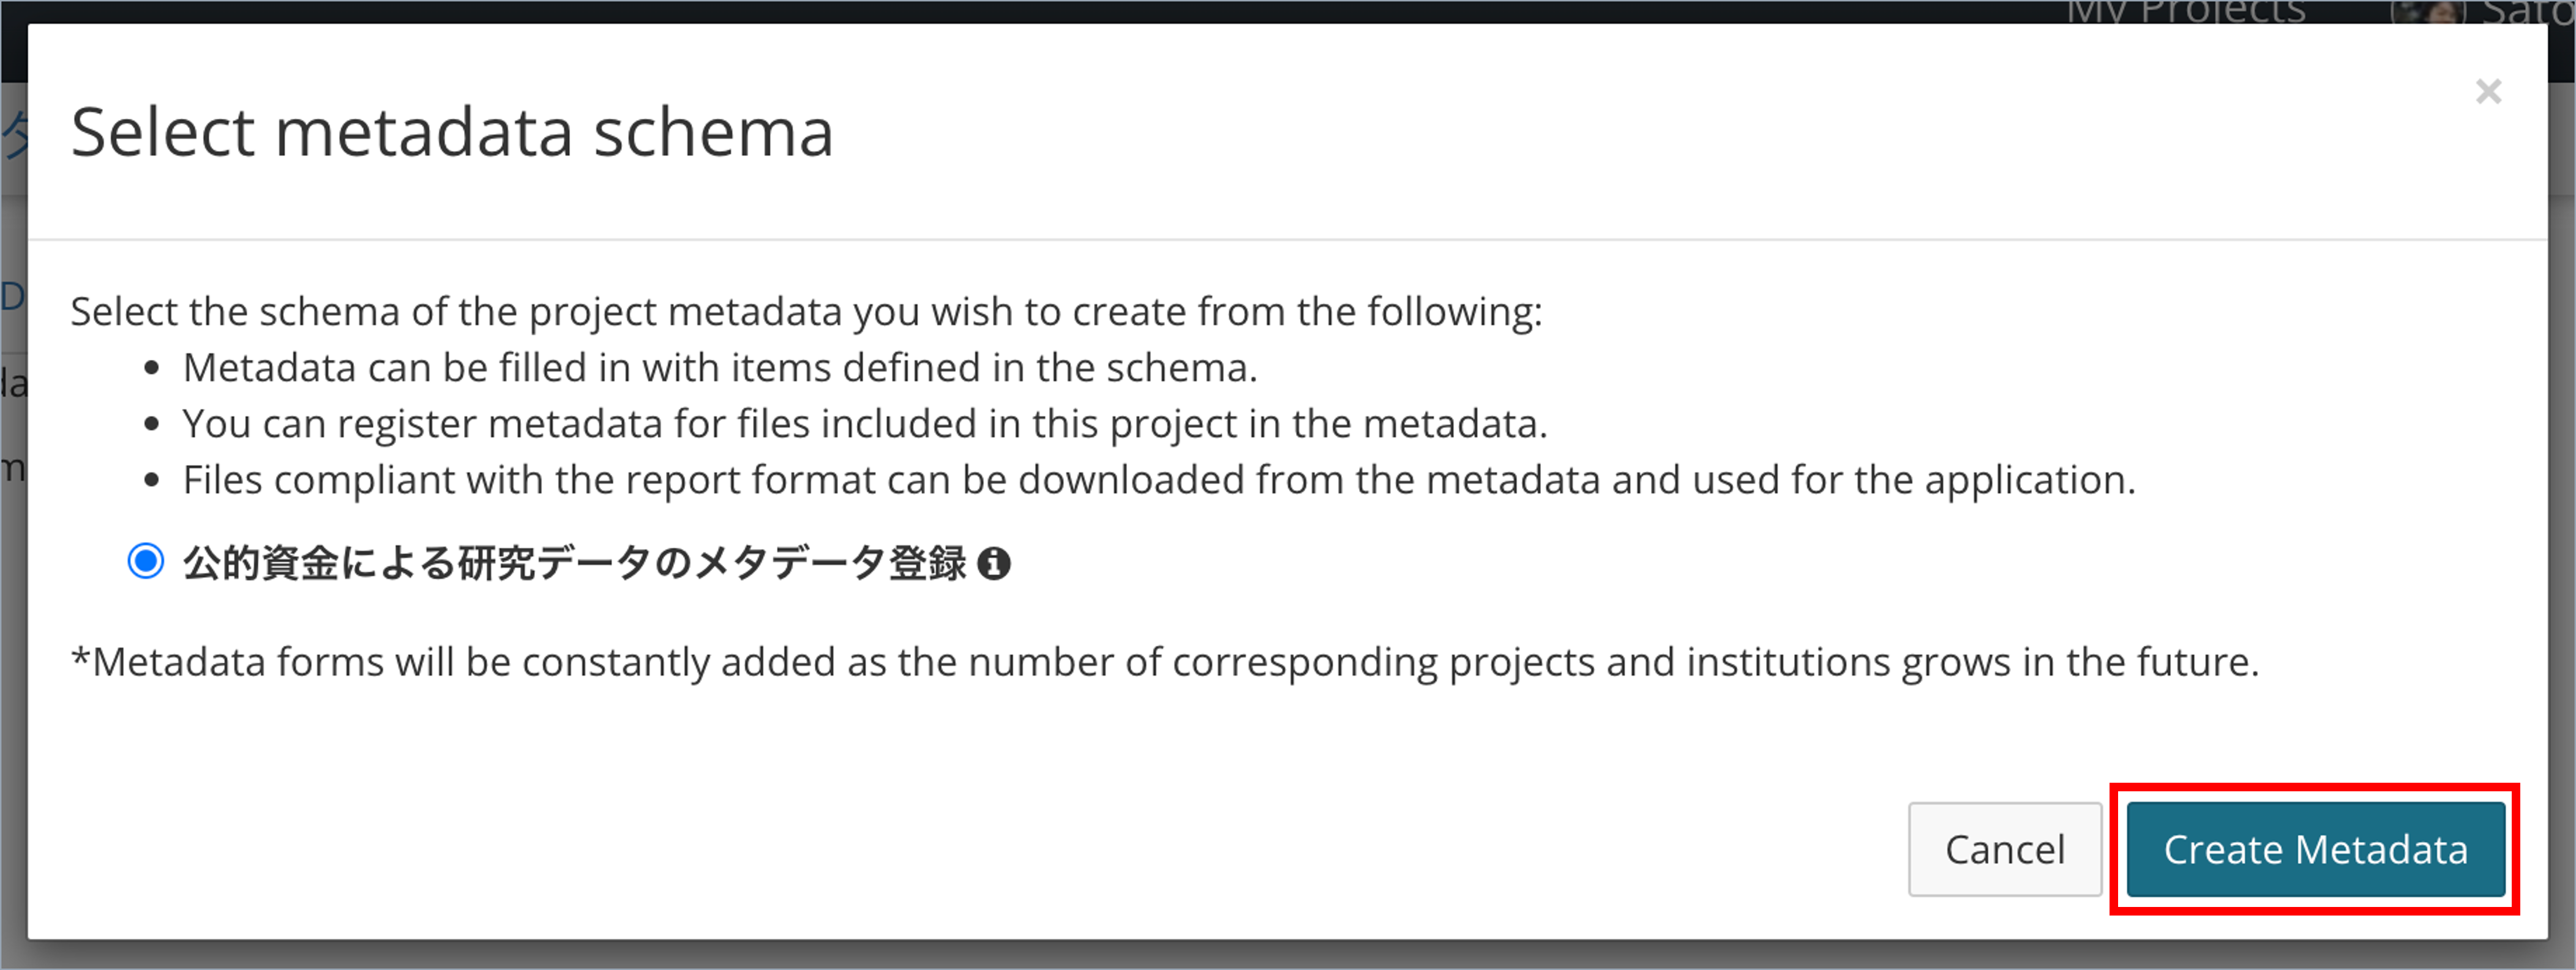
2.Create new project metadata
When you click "Create new metadata," a dialog box will appear requesting you to select a metadata schema. Select a schema of the project metadata you wish to edit.
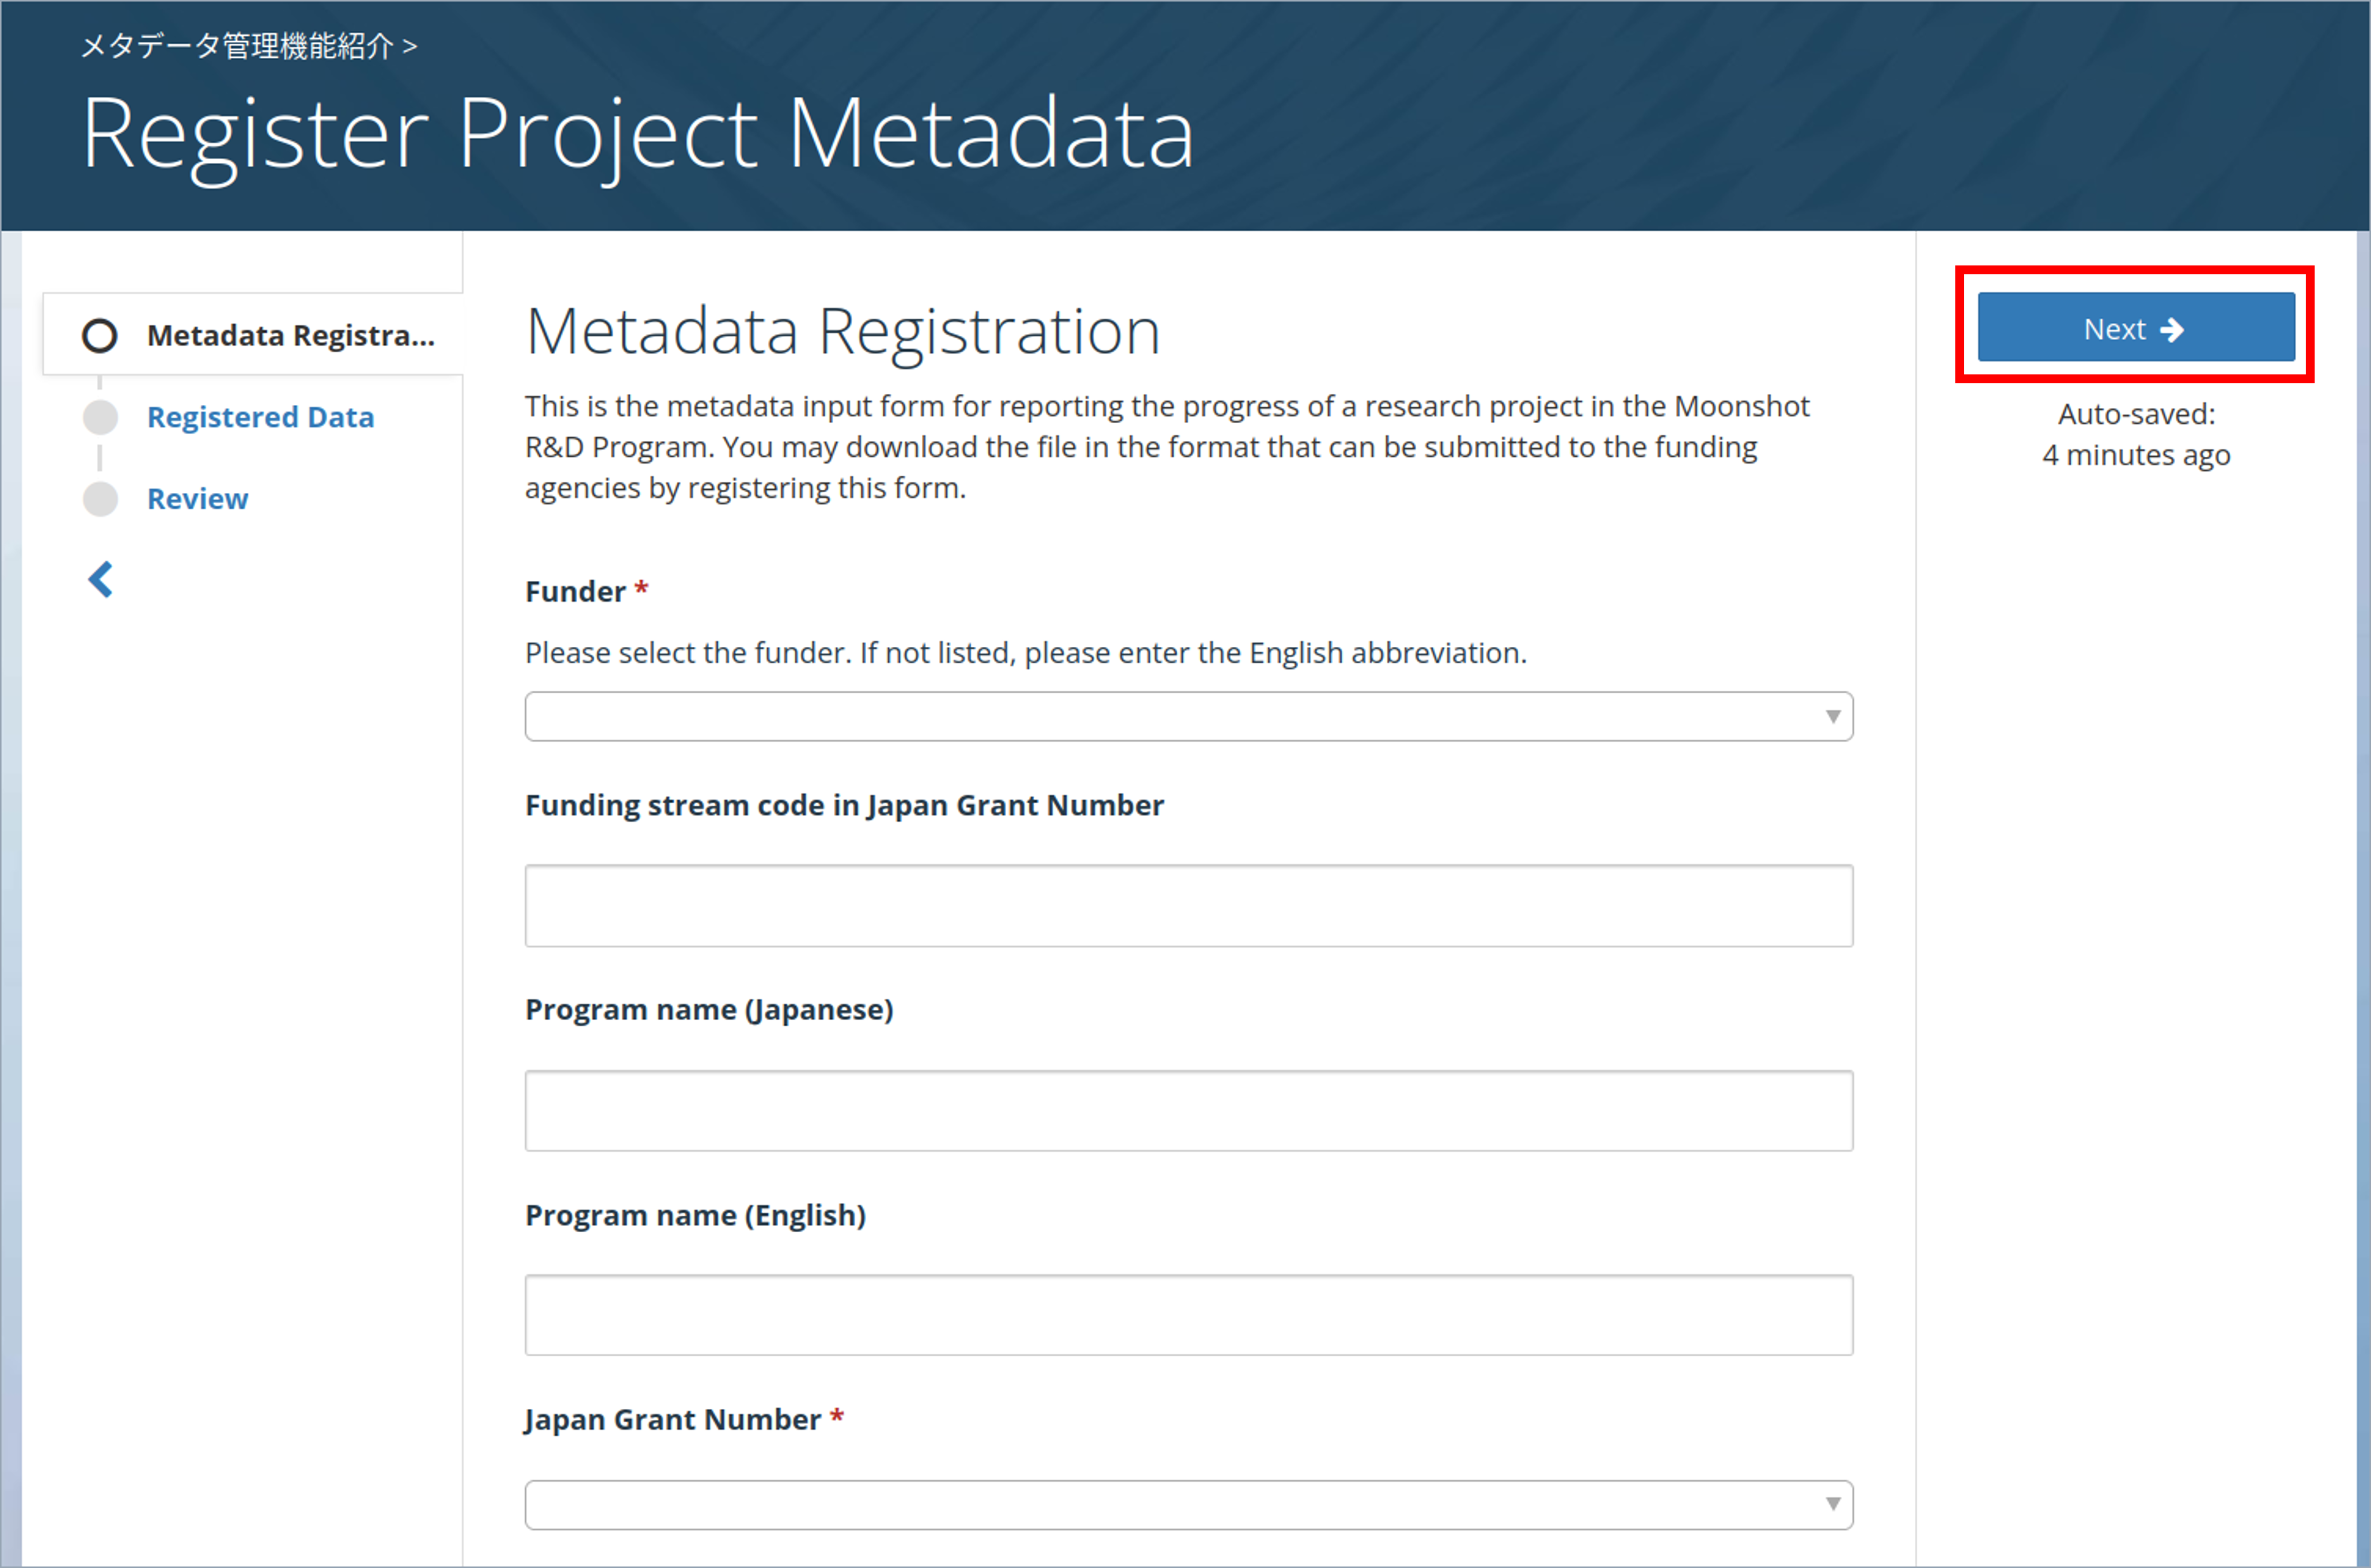
3.Input each metadata field
A screen for inputting each metadata field will appear. Please input an appropriate information for each field.
4.Registering file metadata to the project metadata
Depending on the schema, a screen requesting registration of file metadata may appear.

In such a case, open the main screen of the project, select a file or folder with file metadata.
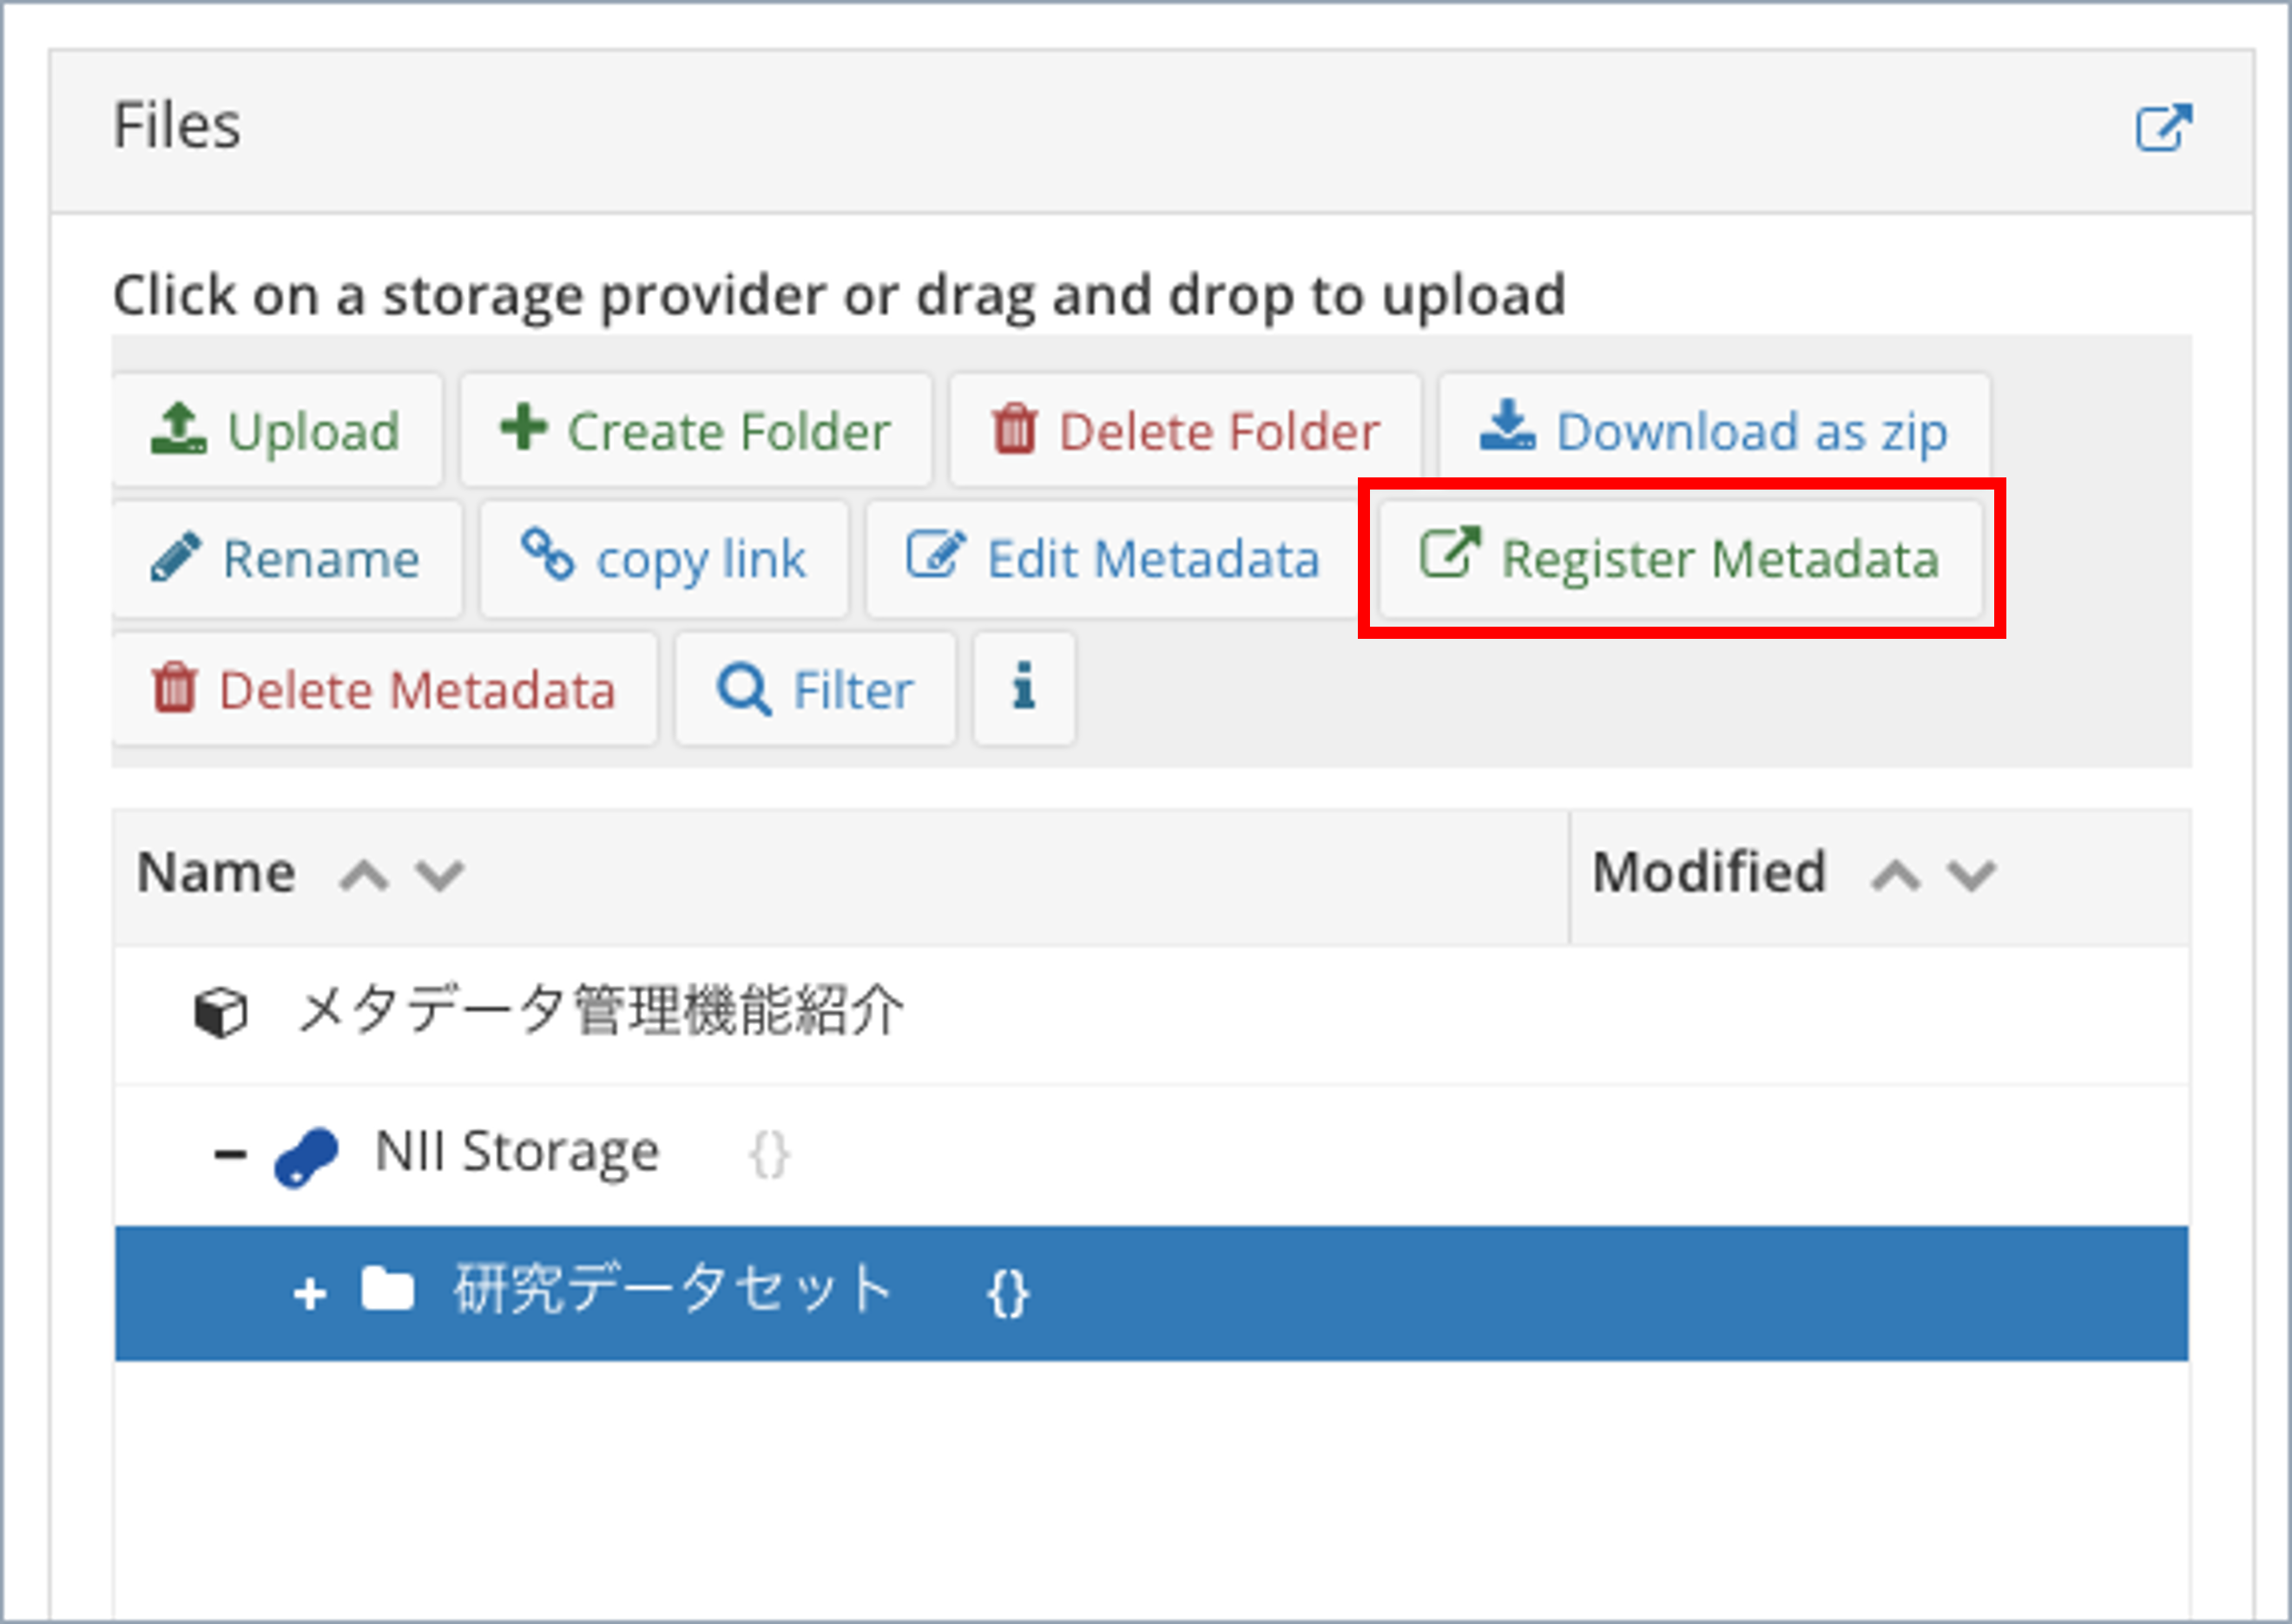
Click the "Register Metadata" button. A list of project metadata is displayed at the file metadata registration target. If the project name has not yet been input, it will be displayed as "No name".
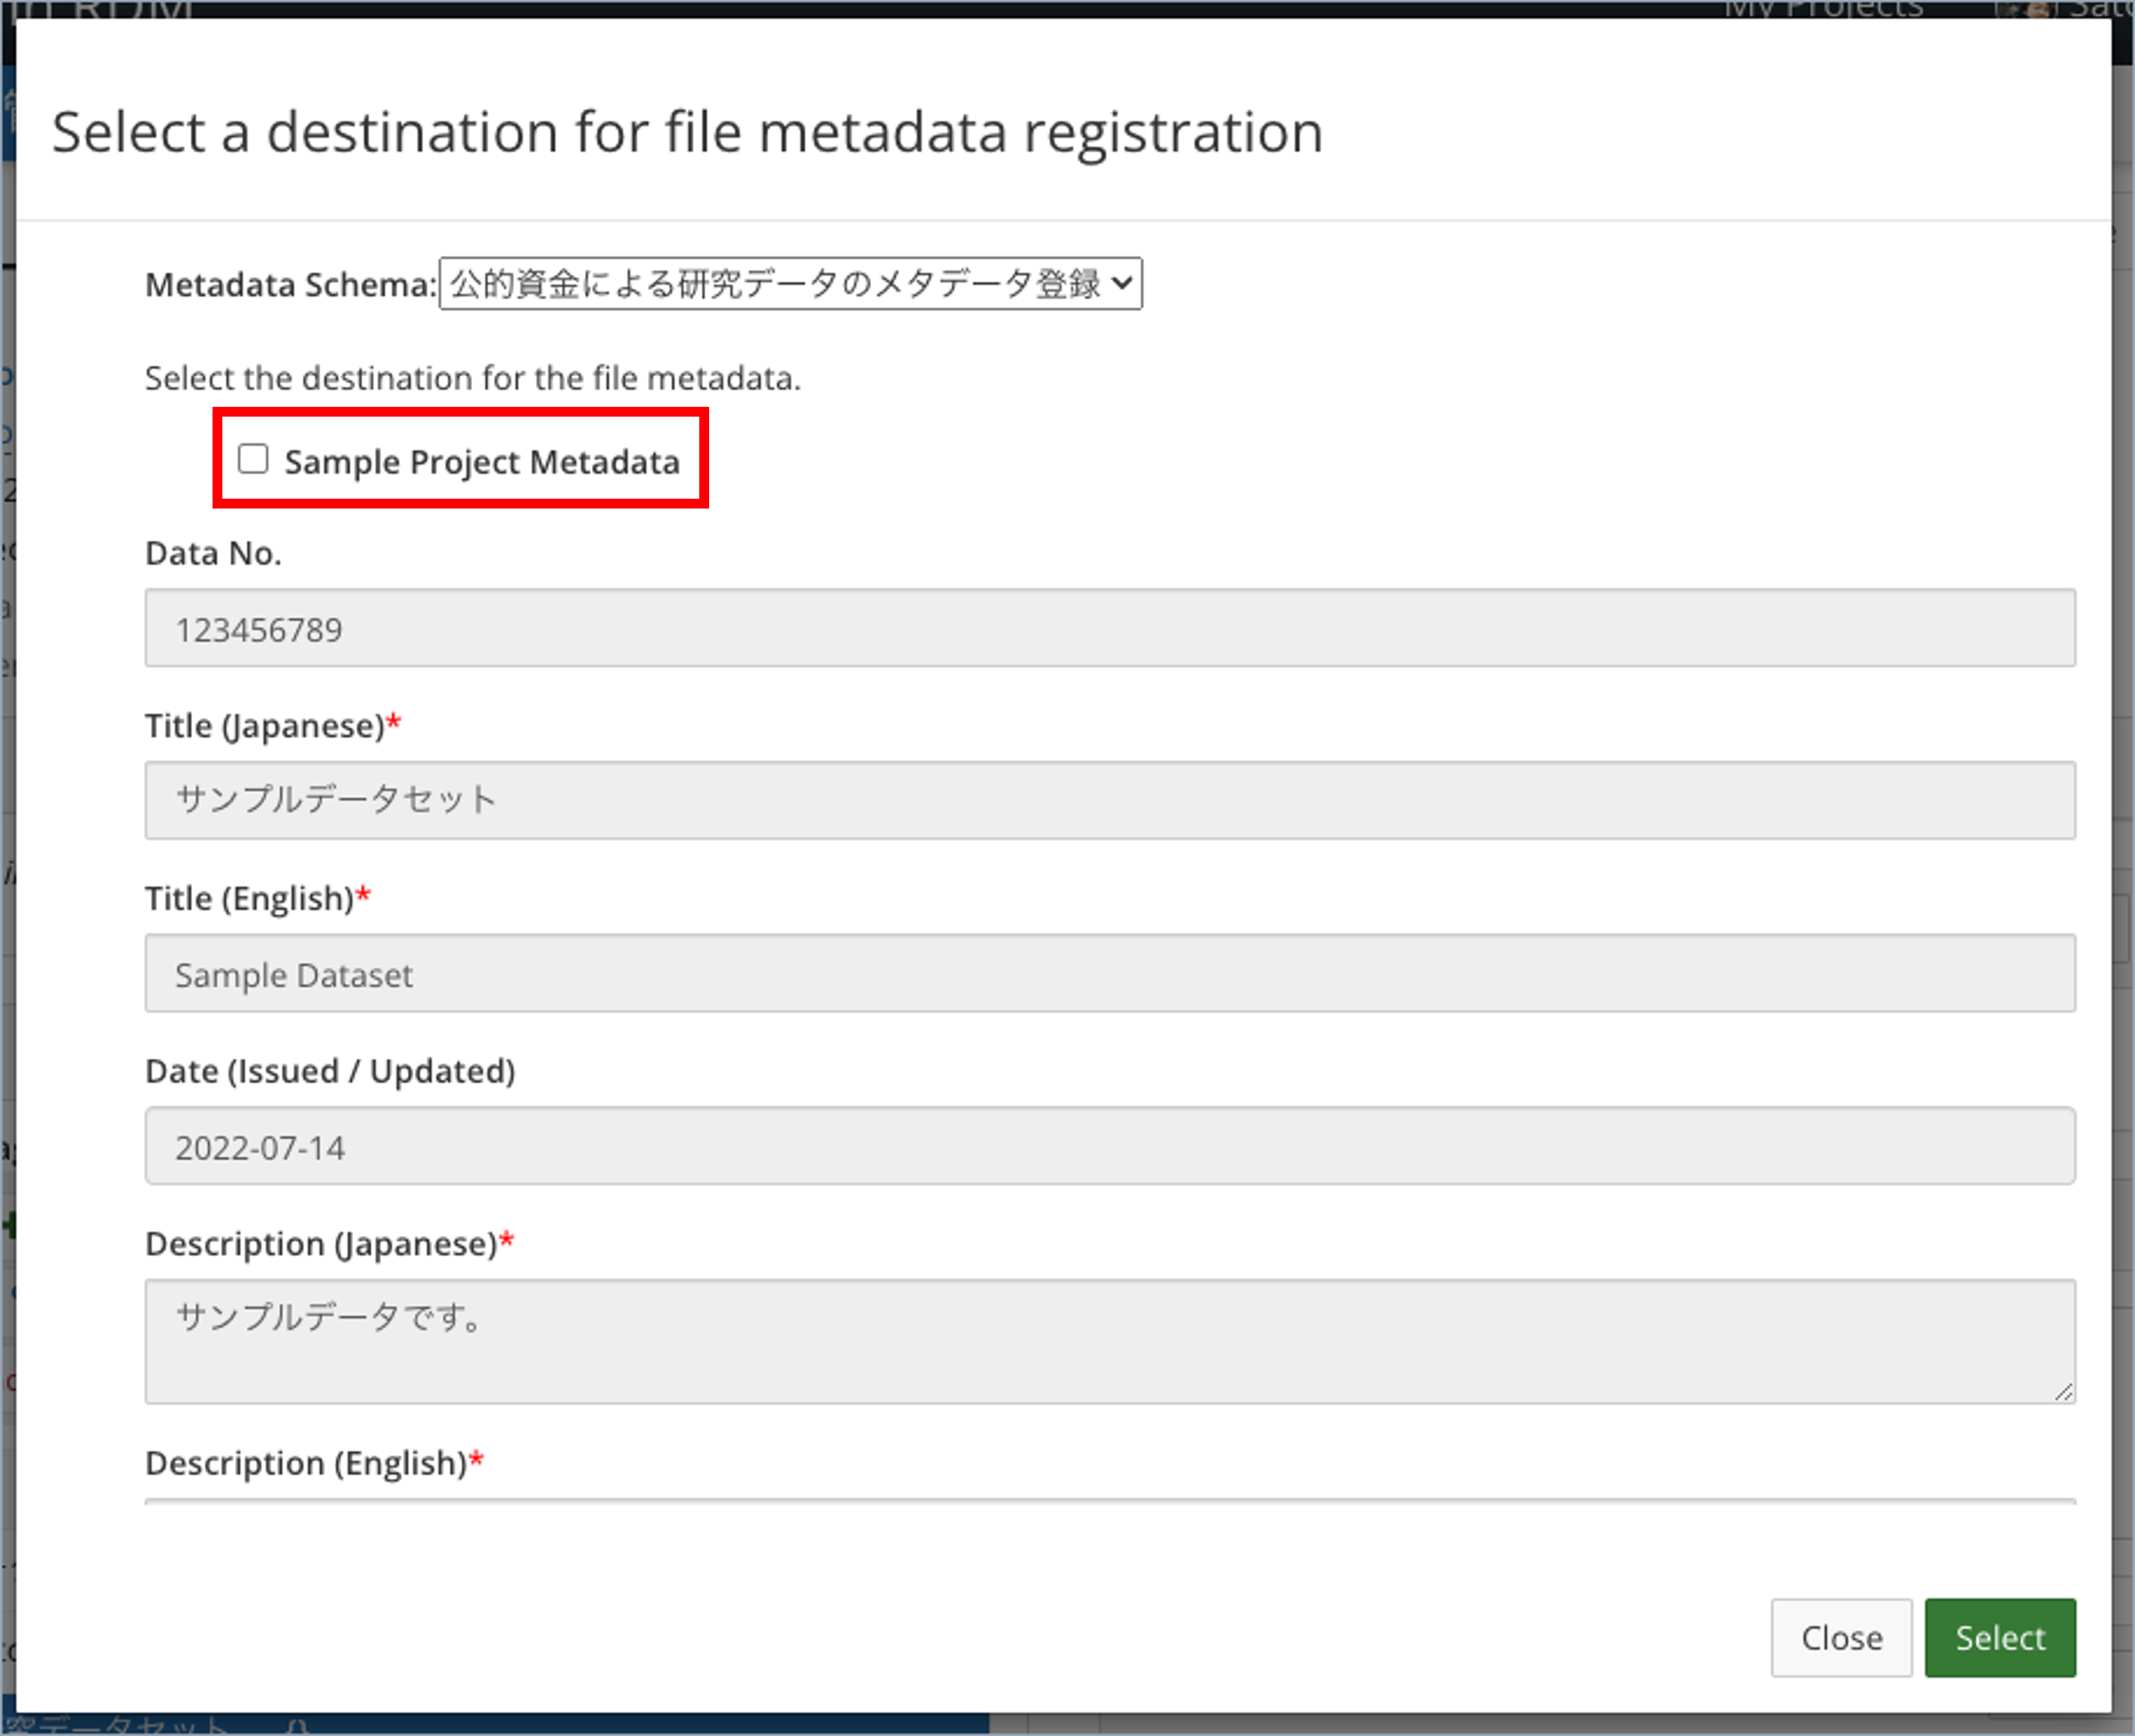
Check the name of the project metadata for which you wish to register file metadata, and click "Select" to register the file metadata in the project metadata.
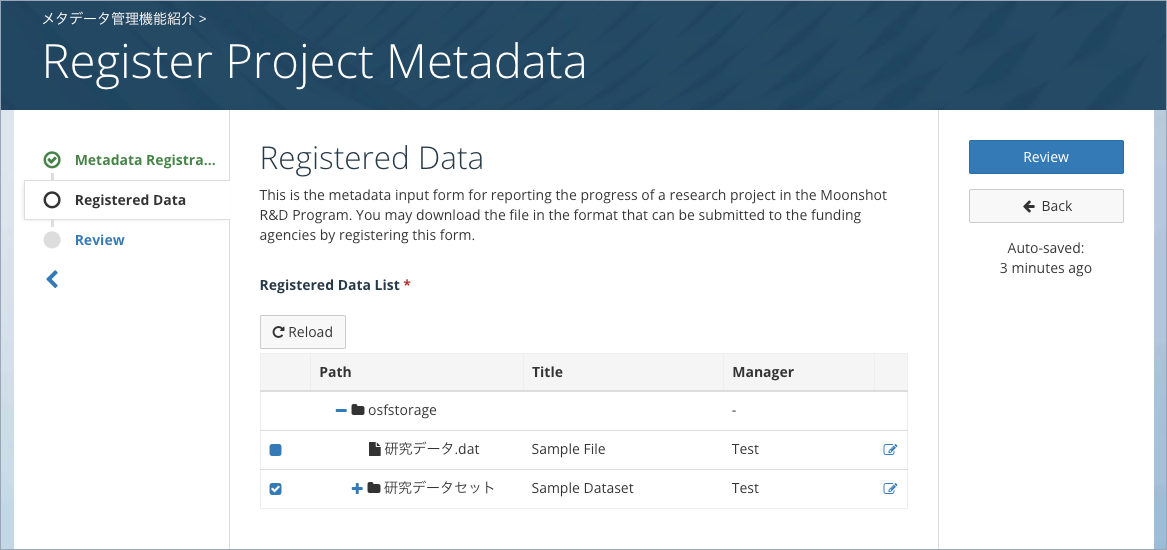
Registered file metadata can be changed to include or not include in project metadata, and the metadata can be edited until project metadata is registered.
5.Registering the project metadata
To finish editing project metadata, click “Project Metadata List” in the upper-left corner of the page or click “Edit Complete” on the content confirmation screen. The Project Metadata List screen will appear. Note that edits are saved automatically, so closing your browser after completing input will also end the editing session.

Registered file metadata is reflected to the values at the time the project metadata is registered.
Exporting project metadata
From registered project metadata, you can export a CSV file that can be used for research reports. Click "Export" on registered project metadata to export a CSV file. You can export a CSV file by clicking “Export” on the content confirmation screen from the project metadata edit screen, or by clicking “Export” on the project metadata list screen.

